
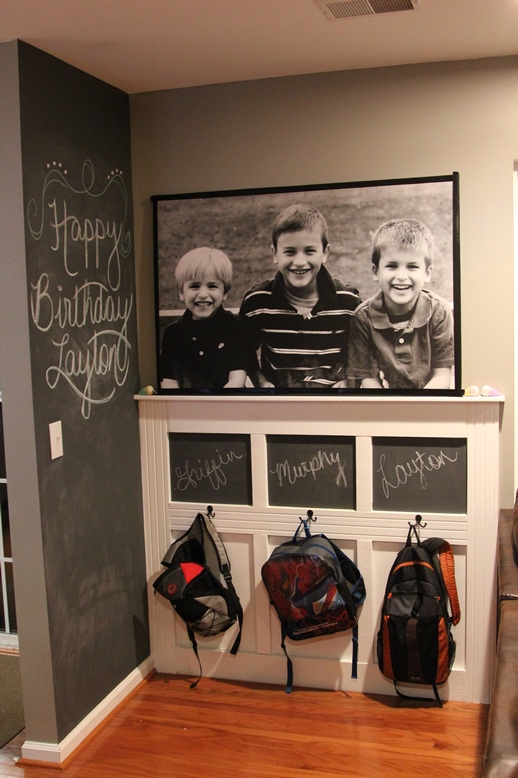
My kids: drop backpack in center of hallway, proceed to fridge, what even is a homework
I was perusing Pinterest for the meaning of life, aka staying sane and organized while raising three boys. No luck there, but I did find this.
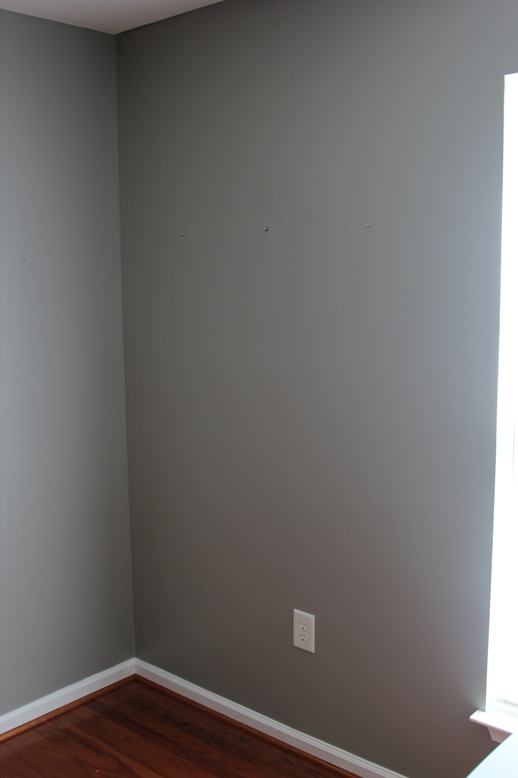
Once my wheels were turning (my husband LOVES it when that happens*), I realized that the corner between my kitchen and family room was four feet of empty, wasted space.
*he does not love it
I measured the space, and sketched out a design with graph paper and *mumbles under breath* PowerPoint, taking into account that daggum outlet. (Whoever thought these cube shelves would be [a] useful for backpacks or [b] attractive after said use was incorrect.) (That’s me, I was incorrect.)

Here are the supplies I needed:
- About 2 days, coffee, snacks and a helpful and patient life partner (optional, but highly recommended)
- 1×6″ trim (I used five 48″ pieces)
- 1×3″ trim (I used five 60″ pieces)
- Hand or miter saw to cut pieces to length
- Hooks with screws (I used 3 double “drunk octopus” hooks)
- Screwdriver
- Wood screws (2.5″ or long enough to get through your trim, 1/2″ of drywall and into a stud)
- Drill and small bit (for pilot holes), optional countersink bit
- Wood putty, putty knife, sandpaper
- Paint (and various accompanying painty stuffs)
- Basic tools like a level, measuring tape, stud finder, etc.
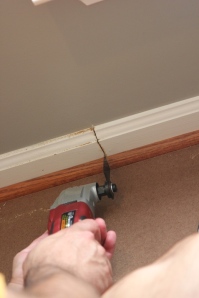
- And we used an oscillating saw to cut off the molding at the edge of our project space:

YOU HAVE A BLOG! MY LIFE IS COMPLETE! I’m going to make it my homepage.
I love this idea…thank you for sharing. I just might try it for my four kids!
I am seriously in LOVE with this! Especially your full chalk wall! Such a fun idea to leave messages for your kids! Love it!
Just this morning, I wrote “have a great first day!” I love it!
I love this! Thank you for all of the helpful tips. Smiles~Beth
Beth says: you’re welcome, Beth!
absolutely love this! I’ve been trying to figure out how to manage this same “mess” in my house and I’ve found my solution!! Thanks!!
Glad you like it! It was fun and purdy easy to do!
Love this!!!
Can you tell me the dimensions you used? Ex: What is the height from the floor to the shelf?
Thanks!!!!
The two pieces on the side were 48″ tall, I believe… I used a 12-foot piece of wood for the sides and the center cross piece, all 48″. So it’s 4 feet wide, plus the 11 inches for the “6s that aren’t really 6″… 59 inches. It’s 59 inches wide. Wow, I’m unhelpful.
I would also advise that you mock it up within your space, using posterboards or something similar so you can see how it will relate to the room.
Thank you!!!
So because of a random facebook comment I saw, I was able to find your little blog, and I was settling in to get all inspired by your creativity and there were only 2 posts!! Blog more, Beth, blog more! 🙂 Love your backpack wall!! Too too cute! And I am very impressed with your $20 coffee table. I have some projects at my house to complete before Natalie arrives…wanna visit? 🙂
Para hacerlos 🙂
That is awesome!!! I wonder if I can do something similar in our rental….not quite so permanent.
Hmm, I bet if you built it on a piece of sturdy plywood and then mounted that, it would be fewer holes in the wall, and you could take it with you!
love how it came together and that picture super cute
Thank you!
Wow, I would live to borrow you for a weekend!!! This is amazing!!
I would love to BE borrowed for a weekend – this is fun for me, but I don’t get to do it often! Thanks for commenting!
Please….I am the most unorganized, leat creative person on the face of this earth….come hang with me for a week in beautiful west central MN. All lakes and forests, and wildlife….I will take you fishing and feed you! Haha…but seriously….
HAHAHAHA!!!! That sounds pretty amazing!
That is amazing! And super inspiring, you make it look so easy! I love, love this idea…definitely on my to do!!
We just did it but with 2 squares only love it
Gorgeous project! And I love the grey colour on the wall behind it! Are you able to tell me what that colour is called?? Pleeeeaaaasssse? 🙂
Thanks!! I’m glad you like it. And yeah, I painted my entire house this color, I love it so much. It’s called Wood Smoke by Glidden. http://www.homedepot.com/p/Glidden-Premium-8-oz-Wood-Smoke-Interior-Paint-Tester-GLN40-D8/202509949
That looks great. What are the dimensions on the inner parts?
Thanks! I can’t recall the dimensions of all the pieces, but the long outside pieces are 48″ each. I just measured my wall and designed something that would fit. Don’t tell anybody, but I used powerpoint to design it. 🙂
My Daughter’s name is Murphy! She’s 16 and amazing and every bit as cool as her name. ❤
Love it! Mine is a boy, and we love the nicknames you can come up with for him! He’s pretty cool too! 🙂
Just out of curiosity how big was your wall.
It was about 57″ wide between the corner and the window, so I made my work area 56″ wide.
Did you manually add the wainscoting to the 1x6s or were you able to buy that at homedepot? I love this and am going to raise is up 18″ to place it above an over-the-fridge cabinet (doors removed) that I am using as a storage bench with baskets in the openings.
Thanks! Sandra
PS: If you have a Habitat for Humanity Restore near you… Check it out. I was able to get two 8ft 1x3s for $1 each, 2 packs of groove&tongue wainscoting for $5 and a 30″x12″x18″ cabinet for $5! It has made my DIYing so much cheaper!
That particular piece of wood already had that on there when I found it, quite literally, on the side of the road. I will check out my nearest Habitat Store here! I always forget to go there, but I’m sure it’s bursting with goodies I can use!! Thanks!
What color paint did you use?
The white is just a primer+paint all in one, no tinting. The wall color is called “Wood Smoke” by Behr, and I LOVE it, it’s the perfect shade of “greige” for me. The chalkboard paint actually started as black paint, which looks charcoal gray after you add the tile grout.
I am seeing some kind of “texture” to the vertical pieces of wood on each side and the horizontal wood just under the chalk boards. What is that, did I miss something? I love this idea!!!
Sharp eye! That piece came with three lines/grooves carved into them already – I assume it was some special kind of trim – but I found it on the side of the road one day, so I can’t tell you any more than that… It was 12 feet long, so I was able to use three long pieces of it here.
Glad you like it, I hope it inspires you to do your own version someday!
We loved this idea so much! We found it on pinterest and shared your link with our readers. Perfect for getting the house ready for back to school time!
Thanks so much! How exciting… it is that time of year already isn’t it?!
Are your walls orange peel textured or are they smooth. I did a similar wall treatment in my kids bathroom and my husband hates it that the inner original wall is textured. He says it’s not a “true” board and batten
Hey, Andrea! Sorry I haven’t replied sooner! They are smooth-ish. Not so textured as an orange peel. Yeah, i would imagine if it’s dimply, it would look strange. You could try cutting a piece of thin wood to size, gluing it in place, calk the edges and paint it to match…
Hello! I’m a writer with ParentMap (www.parentmap.com/) and I’m working on a story about Landing Stations in your home. I LOVE your landing station and am hoping I could use your image with full and proper credit in my story.
If you are ok with this, how should I credit you?
Thank you so much!
Rebecca Mongrain
reebecki@gmail.com
Hi, Rebecca! That’s so exciting!! Yes, you have permission to use any images on the story, and if you need higher res, just let me know and I’ll send them to you. My name is Bethany, and my blog is called Scattershot. 🙂 Is that everything you need?? Sorry, I’ve never been asked that before… that’s so cool!
Thank you so much! I was able to pull them off your site which should work for us. We’ll credit Scattershot and link back to you. I love what you did here and wish I had the space in my entry way to do it!
After saying, I was good. I was wrong! Can I get a high res image sent to my email at reebecki (at) gmail (dot) com? Thank you!